
You may have been trying to spend lesser in your scrapbooking or that you are already fed up with the kits available in the market, so what can you do next? How about creating your own digital backgrounds or papers? All you need is Photoshop (any version) and some Photoshop Brushes.
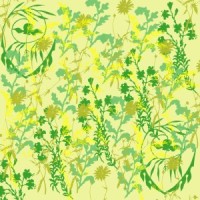
Here is my sample for creating my own background.
How To Install Brushes
Simply go to your Program Files, open the Adobe Folder, then look for the Adobe Photoshop, open it and then open the Presets Folder, then open the Brushes Folder. Simply copy your downloaded brushes that are in .abr file types. Then open your Photoshop and go to brushes and choose from the wide ranges of bushes you added.
How To Make the Backgrounds
Create a new file first, and then set it to 12 inches both for width and height in 300 resolution. You can choose the background color or just fill the color later on. Then choose the brush you want and set its size. Then go to foreground color and set the color for your brush. Then start dabbing your brush on the 12×12 canvas.
If you want to rotate your brush, go to the Brush Tip Shape, move the arrow head or simply input the angle. If you want to just put your brush on corners, for even design, simply rotate the canvas by 90 degrees.
Experiment with it and have fun.
If you want great Photoshop Brushes, get Silvia Gasevic’s Photoshop Brushes Set. She even has tutorials on how to use them. You can even use them commercially if you want to sell your projects. You can actually make your own kits and sell them.
Tagged with digital scrapbooking, photoshop brushes, scrapbook page layout, scrapbooking tips


